引入Knife4j和Web依赖
<!-- knife4j 接口文档 -->
<dependency>
  <groupId>com.github.xiaoymin</groupId>
  <artifactId>knife4j-openapi3-jakarta-spring-boot-starter</artifactId>
  <version>4.4.0</version>
</dependency>
<dependency>
  <groupId>org.springframework.boot</groupId>
  <artifactId>spring-boot-starter-web</artifactId>
</dependency>
<dependency>
  <groupId>org.projectlombok</groupId>
  <artifactId>lombok</artifactId>
  <optional>true</optional>
</dependency>
<dependency>
  <groupId>org.springframework.boot</groupId>
  <artifactId>spring-boot-devtools</artifactId>
  <scope>runtime</scope>
  <optional>true</optional>
</dependency>
<dependency>
  <groupId>org.springframework.boot</groupId>
  <artifactId>spring-boot-starter-test</artifactId>
  <scope>test</scope>
</dependency>
在resoures目录下添加logback.xml文件
<?xml version="1.0" encoding="UTF-8"?>
<configuration>
    <include resource="org/springframework/boot/logging/logback/defaults.xml"/>
    <include resource="org/springframework/boot/logging/logback/console-appender.xml"/>
    <root level="INFO">
        <appender-ref ref="CONSOLE"/>
    </root>
    <logger name="org.springframework.web" level="DEBUG"/>
</configuration>
这是Springboot3给的示例跟Springboot2不同,有略微区别,注意别踩坑!
将如下配置写到application.yml文件中
spring:
  application.name: thumb-backend
  mvc:
    servlet:
      path: /api
knife4j:
  enable: true
  setting:
    language: zh_cn
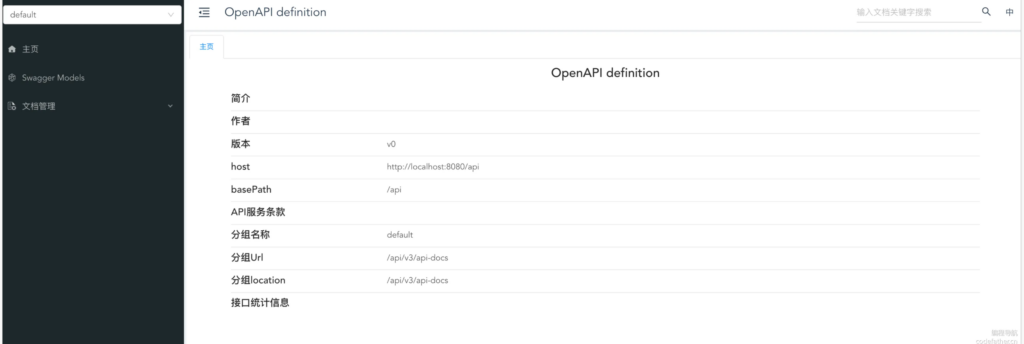
启动项目,访问 http://localhost:8080/api/doc.html 接口文档,看到如下页面就是配置成功了:
同时还能看到相应的日志:

如果遇到 Lombok 注解失效的问题,大概率是兼容性导致的,可以参考方案:https://www.nxcoding.com/archives/lombok-annotation-not-working-springboot
然后引入其他需要的相关依赖:
<!-- hutool 工具包 -->
<dependency>
<groupId>cn.hutool</groupId>
<artifactId>hutool-all</artifactId>
<version>5.8.16</version>
</dependency>
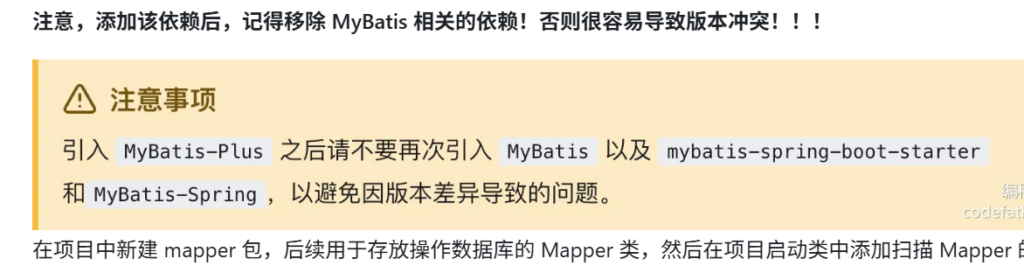
<!-- MyBatis-Plus -->
<dependency>
<groupId>com.baomidou</groupId>
<artifactId>mybatis-plus-spring-boot3-starter</artifactId>
<version>3.5.10.1</version>
</dependency>
<dependency>
<groupId>com.mysql</groupId>
<artifactId>mysql-connector-j</artifactId>
<scope>runtime</scope>
</dependency>
Hutool 是主流的 Java 工具类库,集合了丰富的工具类,涵盖字符串处理、日期操作、文件处理、加解密、反射、正则匹配等常见功能。它的轻量化和无侵入性让开发者能够专注于业务逻辑而不必编写重复的工具代码。例如,DateUtil.formatDate(new Date()) 可以快速将当前日期格式化为字符串。
MyBatis Plus 是 MyBatis 的增强工具,旨在简化开发流程。它提供了开箱即用的 CRUD 方法、动态查询构造器、分页插件和代码生成器等功能,大幅减少重复代码,同时保持与 MyBatis 原生功能的兼容性。例如,通过调用 baseMapper.selectById(id),可以直接查询数据库中的记录,而无需手动编写 SQL。
在 application.yml 中补充如下数据库相关配置:
spring:
  # DataSource Config
  datasource:
    driver-class-name: com.mysql.cj.jdbc.Driver
    url: xxx
    username: xxx
    password: xxx
# mybatis-plus
mybatis-plus:
  configuration:
    map-underscore-to-camel-case: false
    log-impl: org.apache.ibatis.logging.stdout.StdOutImpl
其他通用基础代码(响应包装类、全局异常处理、全局跨域配置等)
通用基础代码
通用基础代码是指:无论在任何后端项目中,都可以复用的代码。这种代码一般 “一辈子只用写一次”,了解作用之后复制粘贴即可,无需记忆。
1、自定义异常
自定义错误码,对错误进行收敛,便于前端统一处理。
💡 这里有 2 个小技巧:
- 自定义错误码时,建议跟主流的错误码(比如 HTTP 错误码)的含义保持一致,比如 “未登录” 定义为 40100,和 HTTP 401 错误(用户需要进行身份认证)保持一致,会更容易理解。
- 错误码不要完全连续,预留一些间隔,便于后续扩展。
在 exception 包下新建错误码枚举类:
@Getter
public enum ErrorCode {

    SUCCESS(0, "ok"),
    PARAMS_ERROR(40000, "请求参数错误"),
    NOT_LOGIN_ERROR(40100, "未登录"),
    NO_AUTH_ERROR(40101, "无权限"),
    NOT_FOUND_ERROR(40400, "请求数据不存在"),
    FORBIDDEN_ERROR(40300, "禁止访问"),
    SYSTEM_ERROR(50000, "系统内部异常"),
    OPERATION_ERROR(50001, "操作失败");

    /**
     * 状态码
     */
    private final int code;

    /**
     * 信息
     */
    private final String message;

    ErrorCode(int code, String message) {
        this.code = code;
        this.message = message;
    }

}
一般不建议直接抛出 Java 内置的 RuntimeException,而是自定义一个业务异常,和内置的异常类区分开,便于定制化输出错误信息:
@Getter
public class BusinessException extends RuntimeException {
/**
 * 错误码
 */
private final int code;

public BusinessException(int code, String message) {
    super(message);
    this.code = code;
}

public BusinessException(ErrorCode errorCode) {
    super(errorCode.getMessage());
    this.code = errorCode.getCode();
}

public BusinessException(ErrorCode errorCode, String message) {
    super(message);
    this.code = errorCode.getCode();
}
}
为了更方便地根据情况抛出异常,可以封装一个 ThrowUtils,类似断言类,简化抛异常的代码:
public class ThrowUtils {

    /**
     * 条件成立则抛异常
     *
     * @param condition        条件
     * @param runtimeException 异常
     */
    public static void throwIf(boolean condition, RuntimeException runtimeException) {
        if (condition) {
            throw runtimeException;
        }
    }

    /**
     * 条件成立则抛异常
     *
     * @param condition 条件
     * @param errorCode 错误码
     */
    public static void throwIf(boolean condition, ErrorCode errorCode) {
        throwIf(condition, new BusinessException(errorCode));
    }

    /**
     * 条件成立则抛异常
     *
     * @param condition 条件
     * @param errorCode 错误码
     * @param message   错误信息
     */
    public static void throwIf(boolean condition, ErrorCode errorCode, String message) {
        throwIf(condition, new BusinessException(errorCode, message));
    }
}
2、响应包装类
一般情况下,每个后端接口都要返回调用码、数据、调用信息等,前端可以根据这些信息进行相应的处理。
我们可以封装统一的响应结果类,便于前端统一获取这些信息。
通用响应类:
@Data
public class BaseResponse<T> implements Serializable {

    private int code;

    private T data;

    private String message;

    public BaseResponse(int code, T data, String message) {
        this.code = code;
        this.data = data;
        this.message = message;
    }

    public BaseResponse(int code, T data) {
        this(code, data, "");
    }

    public BaseResponse(ErrorCode errorCode) {
        this(errorCode.getCode(), null, errorCode.getMessage());
    }
}
但之后每次接口返回值时,都要手动 new 一个 BaseResponse 对象并传入参数,比较麻烦,我们可以新建一个工具类,提供成功调用和失败调用的方法,支持灵活地传参,简化调用。
public class ResultUtils {

    /**
     * 成功
     *
     * @param data 数据
     * @param <T>  数据类型
     * @return 响应
     */
    public static <T> BaseResponse<T> success(T data) {
        return new BaseResponse<>(0, data, "ok");
    }

    /**
     * 失败
     *
     * @param errorCode 错误码
     * @return 响应
     */
    public static BaseResponse<?> error(ErrorCode errorCode) {
        return new BaseResponse<>(errorCode);
    }

    /**
     * 失败
     *
     * @param code    错误码
     * @param message 错误信息
     * @return 响应
     */
    public static BaseResponse<?> error(int code, String message) {
        return new BaseResponse<>(code, null, message);
    }

    /**
     * 失败
     *
     * @param errorCode 错误码
     * @return 响应
     */
    public static BaseResponse<?> error(ErrorCode errorCode, String message) {
        return new BaseResponse<>(errorCode.getCode(), null, message);
    }
}
3、全局异常处理器
为了防止意料之外的异常,利用 AOP 切面全局对业务异常和 RuntimeException 进行捕获:
@RestControllerAdvice
@Slf4j
public class GlobalExceptionHandler {
@ExceptionHandler(BusinessException.class)
public BaseResponse<?> businessExceptionHandler(BusinessException e) {
log.error("BusinessException", e);
return ResultUtils.error(e.getCode(), e.getMessage());
}
@ExceptionHandler(RuntimeException.class)
public BaseResponse<?> runtimeExceptionHandler(RuntimeException e) {
log.error("RuntimeException", e);
return ResultUtils.error(ErrorCode.SYSTEM_ERROR, "系统错误");
}
}
4、请求包装类
对于 “分页”、“删除某条数据” 这类通用的请求,可以封装统一的请求包装类,用于接受前端传来的参数,之后相同参数的请求就不用专门再新建一个类了。=
分页请求包装类,接受页号、页面大小、排序字段、排序顺序参数:
@Data
public class PageRequest {
/**
* 当前页号
*/
private int current = 1;
/**
* 页面大小
*/
private int pageSize = 10;
/**
* 排序字段
*/
private String sortField;
/**
* 排序顺序(默认降序)
*/
private String sortOrder = "descend";
}
删除请求包装类,接受要删除数据的 id 作为参数:
@Data
public class DeleteRequest implements Serializable {

    /**
     * id
     */
    private Long id;

    private static final long serialVersionUID = 1L;
}
5、全局跨域配置
跨域是指浏览器访问的 URL(前端地址)和后端接口地址的域名(或端口号)不一致导致的,浏览器为了安全,默认禁止跨域请求访问。Ad0nyAbj5IKLNU8OxOI1UbpV9sTAI3+8RJUqCQ+p9nY=
为了开发调试方便,我们可以通过全局跨域配置,让整个项目所有的接口支持跨域,解决跨域报错。
新建 config 包,用于存放所有的配置相关代码。全局跨域配置代码如下:
@Configuration
public class CorsConfig implements WebMvcConfigurer {

    @Override
    public void addCorsMappings(CorsRegistry registry) {
        // 覆盖所有请求
        registry.addMapping("/**")
                // 允许发送 Cookie
                .allowCredentials(true)
                // 放行哪些域名(必须用 patterns,否则 * 会和 allowCredentials 冲突)
                .allowedOriginPatterns("*")
                .allowedMethods("GET", "POST", "PUT", "DELETE", "OPTIONS")
                .allowedHeaders("*")
                .exposedHeaders("*");
    }
}
编写示例接口
移除 controller 包下的其他代码,让项目干净一些,然后编写一个纯净的 /health 接口用于健康检查:
@RestController
@RequestMapping("/")
public class MainController {

    /**
     * 健康检查
     */
    @GetMapping("/health")
    public BaseResponse<String> health() {
        return ResultUtils.success("ok");
    }
}

最后完整项目如图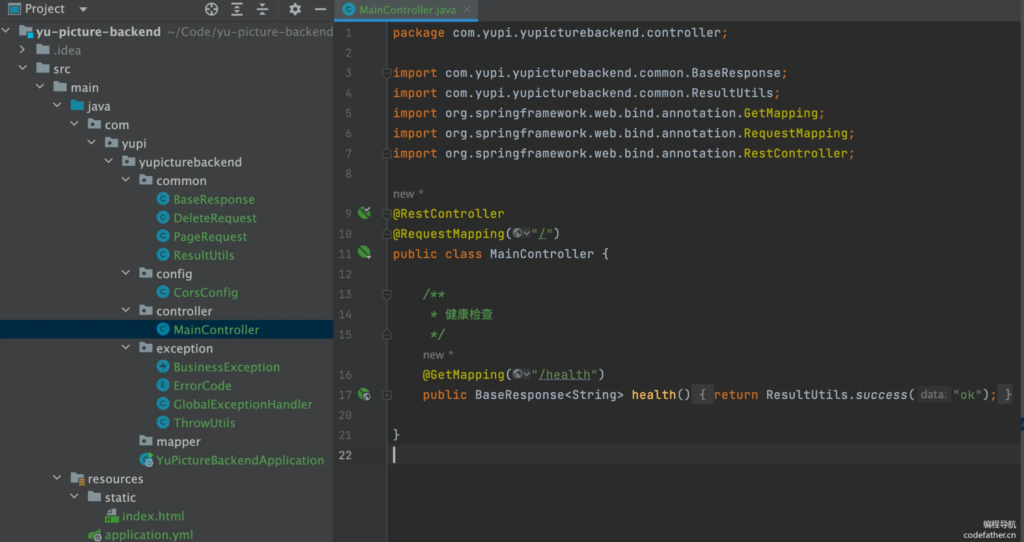
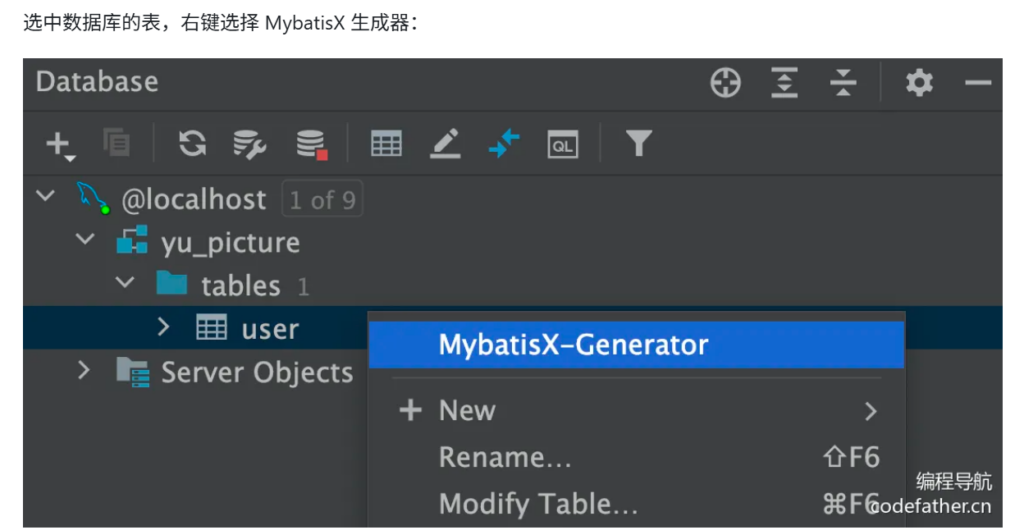
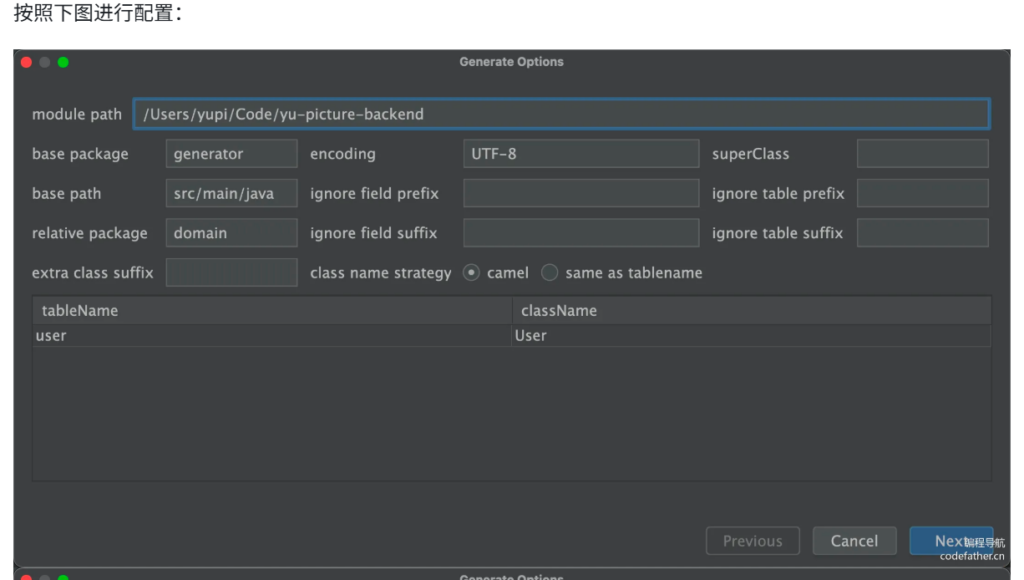
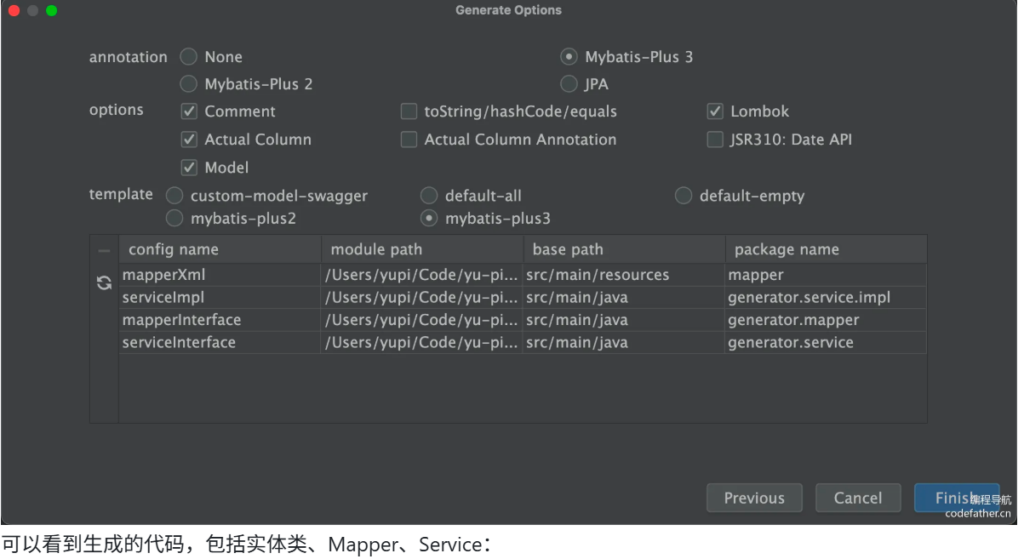
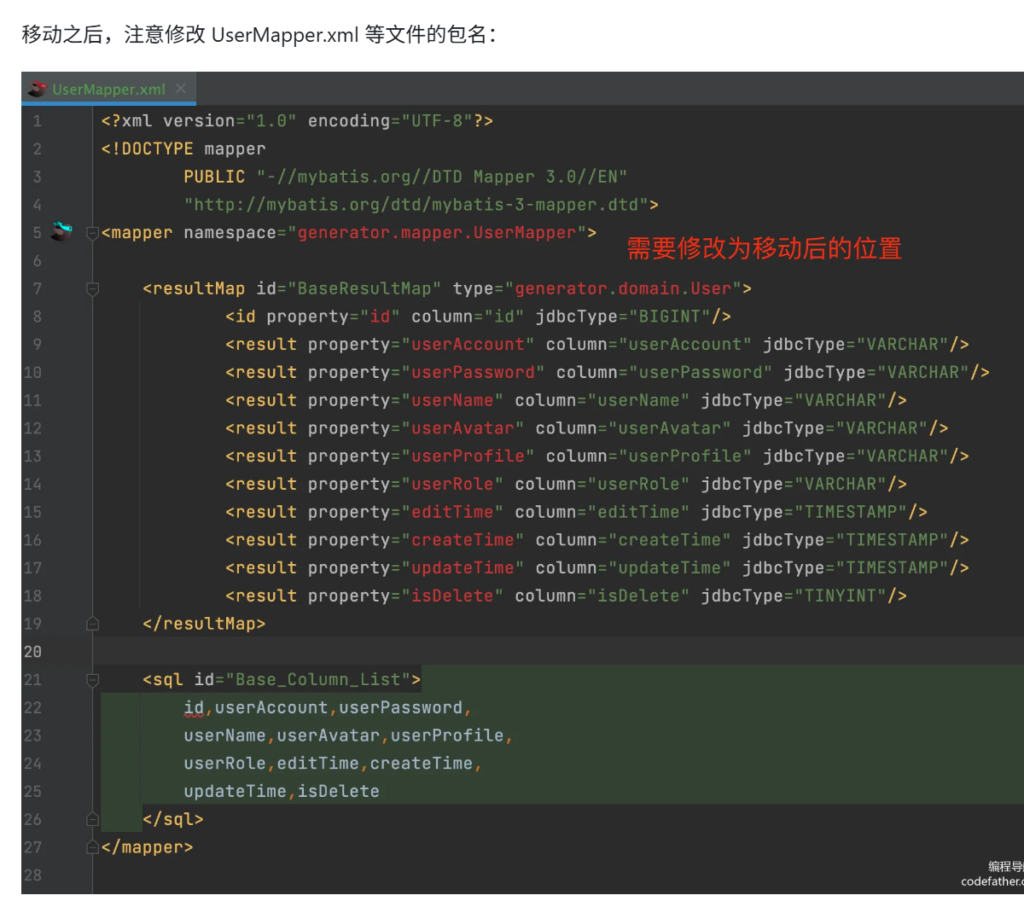
Mybatis-plus的使用